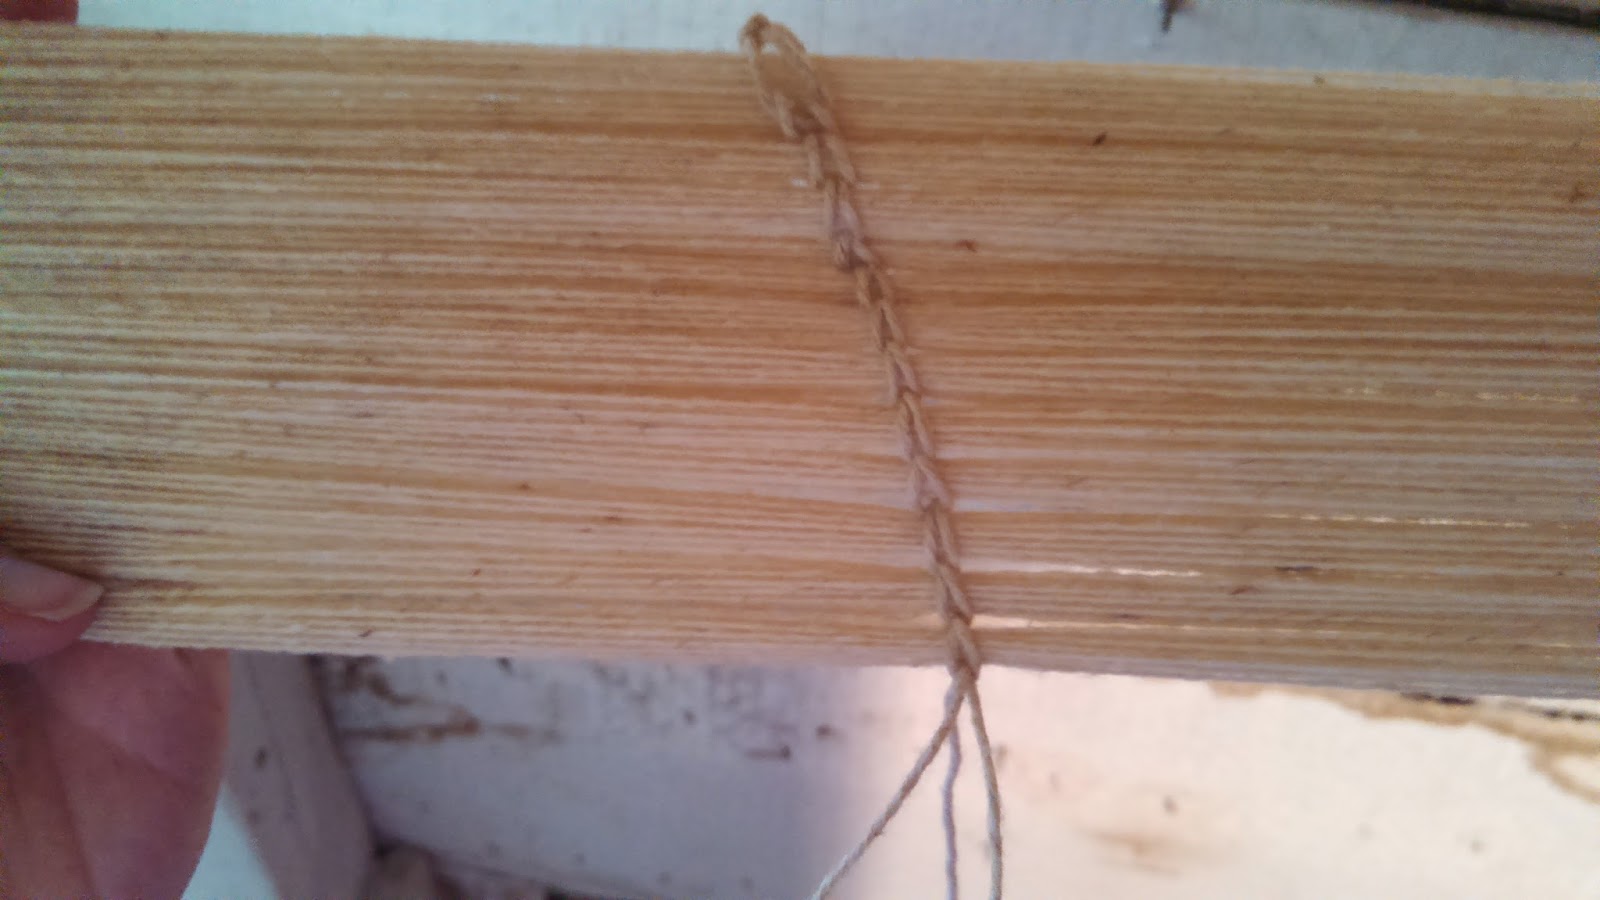
In the fall of 2013, I managed to get over to the OCGH and wind half of the warp on the huge warping board that had been found in the attic with the loom. (It was actually only the 2 vertical pieces, the ones with the pegs; the horizontal pieces were not to be found. I used large wood clamps to attach the pieces directly to the studs in the room.) I put a cross at both ends, not yet decided on how I would approach the warping, and sectioned it off in 1" (20 ends) bunches. Then it got cold, and since the loom is in a shed, working on it in the cold weather was not practical.
Sectioned in 20-end (1") bunches
When I returned in the spring of 2014, the half warp was waiting for me. I removed it, rolling it on sticks to keep it even. Then I spent a couple hours winding the second half. I had two cones of the yarn, so the warping time was reduced by winding 2 ends at a time. Not having more dowels with me, I left the warp on the warping board. When I returned a couple weeks later, to my horror I found that mice had found the wool and eaten it beyond recovery. Now I was really glad that the cones were so big. I was also very thankful that I had decided to store the first half of the warp at my house.
The Mouse Feast
Take 2 on the second half of the warp: In light of the resident mice, I decided to rewind on my warping board at home. My warping board isn't as wide as the one at the OCGH, but it would work. I measured the length of the warp at the OCGH using a twine, knotted at the appropriate length. I put that guide twine onto my warping board and started winding. By mistake, 100 ends later, I discovered that I had somehow measured wrong and that this half was shorter than the first half. Argh. (I now have a 200-end, 9 yard warp of wool singles ready for some other project, someday.)
Take 3 on the second half of the warp: I took the first half outside and unrolled it, remeasured it on the twine AND with a tape measure. Back at my warping board, I started again, using the guide twine AND measuring twice. 260 ends later, I rolled up the warp and looked forward to another trip to the OCGH to do some beaming.
In July 2013, I attended NEWS (New England Weavers' Seminar) and took a
class with Marjie Thompson, who is known for her work with historic
textiles. She gave me some tips on patterns and fibers. We talked about
linsey-woolsey (linen warp, wool weft), all linen, and all wool.
Linsey-woolsey and linen fabrics are typically sett relatively close. So, since the heddles for this project are knit at 20 epi (10 epi on 2 harnesses), I've decided to do an all wool fabric.
My weaving friend Dorothy had a huge stash of a natural color wool
singles - 2800 yds/lb and 35wpi - and she generously donated two huge cones of it. I made a
sample on my Harrisville, and tried out some different accent colors for
horizontal stripes, all of different weights. I didn't have a 10d reed, so I used a 12d
reed sleyed 2-2-1, resulting in some pretty serious reed marks, which became less
obvious after washing. The accent wool colors were various weights, and I beat them differently. Some of the accent colors fulled differently than others during washing.
Sample after washing
Sample before washing
In the photos:
Green - 5300 yds/lb, 20 ppi
Natural - 2800 yds/lb, 14 ppi
Red - 2100 yds/lb, 13 ppi
Charcoal 3200 yds/lb,18 ppi
I also tried the green doubled at 14 ppi and at 12 ppi, and the natural beat at 11 ppi. (Not shown in the photo.)
My conclusion is that Dorothy's singles yarn would work well at the given sett. The fabric weight is perfect for a blanket, and it could be displayed on one of the beds in the Garrison House. With a weaving width of 26" and taking shrinkage into account, it would need 3 panels. To allow 2 yds/panel plus loom waste and lots of extra, I decided to warp 10 yds. There was plenty of yarn, thankfully...
The bottom line here is that lots has been going on, but I'm not a faithful blogger.
The fabric has been planned, the warp wound and beamed, the heddles threaded, and the reed is being sleyed. Dan also made a custom bench. Over the next few days I plan to catch up on the details of all this activity in my blog. In the mean time, here's a teaser and a Save the Date notice.
Heddles threaded; reed sleying in progress.
On Sunday 28 September 2014, the OCGH is holding their annual Colonial Crafts Day. Dan and I will both be there. Dan will have his Joyner tools, and I'll be in the shed working on the loom. The event (free, but donations welcome) runs 2-5 pm. Check their website for directions and other details.
Well the plan had been to finish knitting the heddles over the long New England winter. Winter passed. Spring passed. Summer almost passed, and I finally just sat down and did it. The heddles are done! Dan also finished making the pulley wheel and the treadles.
Last October, we were at an event at Strawberry Banke and purchased some handmade rope. It's perfect for the loom and even resembles the original rope that was on it, although slightly thicker.
I went over to the OCGH a couple weeks ago and started putting the harnesses on. We started by just tying loose knots to get everything hung, and then I worked on getting all the geometry correct. I tied a string from the breast beam, through the reed, through a heddle, and to the back beam. (It's kind of visible in the picture.) What I discovered is that the beater is too low, which means that the shed opening is limited. It's going to be an easy fix - we just need to put a spacer at the top of the beater.
Some of the barn frame looms at Marshfield School of Weaving.
Following my last post, I did some networking. Craig had told me that Norman Kennedy knew how to "knit heddles". In trying to contact Norman, I found Kate Smith of Marshfield School of Weaving, who had learned how to do it from Norman. Kate said she was willing to set up a class with one of the teachers at her studio, Alison Pyott. So on 27 September, Laura Busky, Diane Howes and I piled in to my minivan and headed up to Marshfield, VT. (Maxx went along, too. Kate and her people are very dog friendly.) It was a beautiful fall day, and the 3 1/4 hour drive went quickly with the good company.
Laura and Diane get the hang of it quickly.
After a quick orientation and tour around the amazing studio facilities, we got started. Alison gave us a demo and then set us to work. Laura and Diane sat on opposite sides of one setup, working in tandem, while I started a new set of heddles on Diane's jig. We used 12/6 cotton seine twine wrapped on netting shuttles.
One thing about these heddles is that on each harness, all the heddles are connected. That is, they are made from continuous threads tied to a guide thread along the top and bottom of the harness. That means that you need to decide on how many heddles per inch are needed for the project before starting to make them. Since I didn't have a particular project in mind, but I know that I have several reeds available, I decided to go with the nice round number of 10 per inch. With 2 harnesses, that gives me 20 ends per inch to weave with. (There's no rule that you have to use all of the heddles, so I could skip some when threading and go with fewer epi, but I won't be able to use a higher sett.) An additional thread is used along the edges to mark off sets of heddles (10, in this case) to help keep track.
Here's a video of the process. There are 2 steps, so you may have to watch it twice to catch both parts. The first (Diane's part) is to take the shuttle down under the harness stick, around the center dowel, and back over the harness stick. Using the shuttle, the thread is looped around the guide thread and then tied in a half hitch to secure it. This process is repeated 10 times, spacing the heddles as evenly as possible along one inch of the heddle stick.
The second part (Laura's part) is a bit more complicated. A separate shuttle and twine is used. Starting on the opposite harness stick, the thread is brought under the harness and around the dowel, bringing it through the first loop on the other side. This connects the two parts of the heddle. Shaped around the dowel, a clove hitch (2 half hitches) makes the heddle eye. Then back over the harness stick, wrap around the guide thread, and tie a half hitch to complete the heddle. Repeat for each of the loops.
When the heddles are complete (sometime in the future), the center dowel is pulled out, revealing the heddle eye.
The process looks complicated at first, but it's very repetitive, and once you get the pattern, it goes pretty fast. The key is keeping the heddles evenly spaced and evenly tensioned. The first set of 10 was slow, especially since I was pulling too tight and had to cut them off and start again, but after that I settled into the pattern. By the end of the afternoon, I had about 3" completed. We were back in Westford in time to do some spinning with the Westford Spinners that evening. It was a long but happy day.
The heddles in progress on the jig with the OCGH loom in the background
Diane's jig was missing some legs, so Dan turned 3 new ones out of some oak on Saturday. On Sunday the OCGH had its annual Colonial Craft Day. I took the jig and partially knitted heddles over with me to work on. Visitors were interested in the process, but it took some creative arm waving to explain to the non-weavers what the heddles were going to be used for. I got a few more inches finished before running out of thread. My LYS (The Fiber Loft) has it on order, so hopefully I'll be back in production in a few days. In the mean time, I got some flax spinning done on my Country Craftsman wheel (visible between the heddle jig and the loom.)
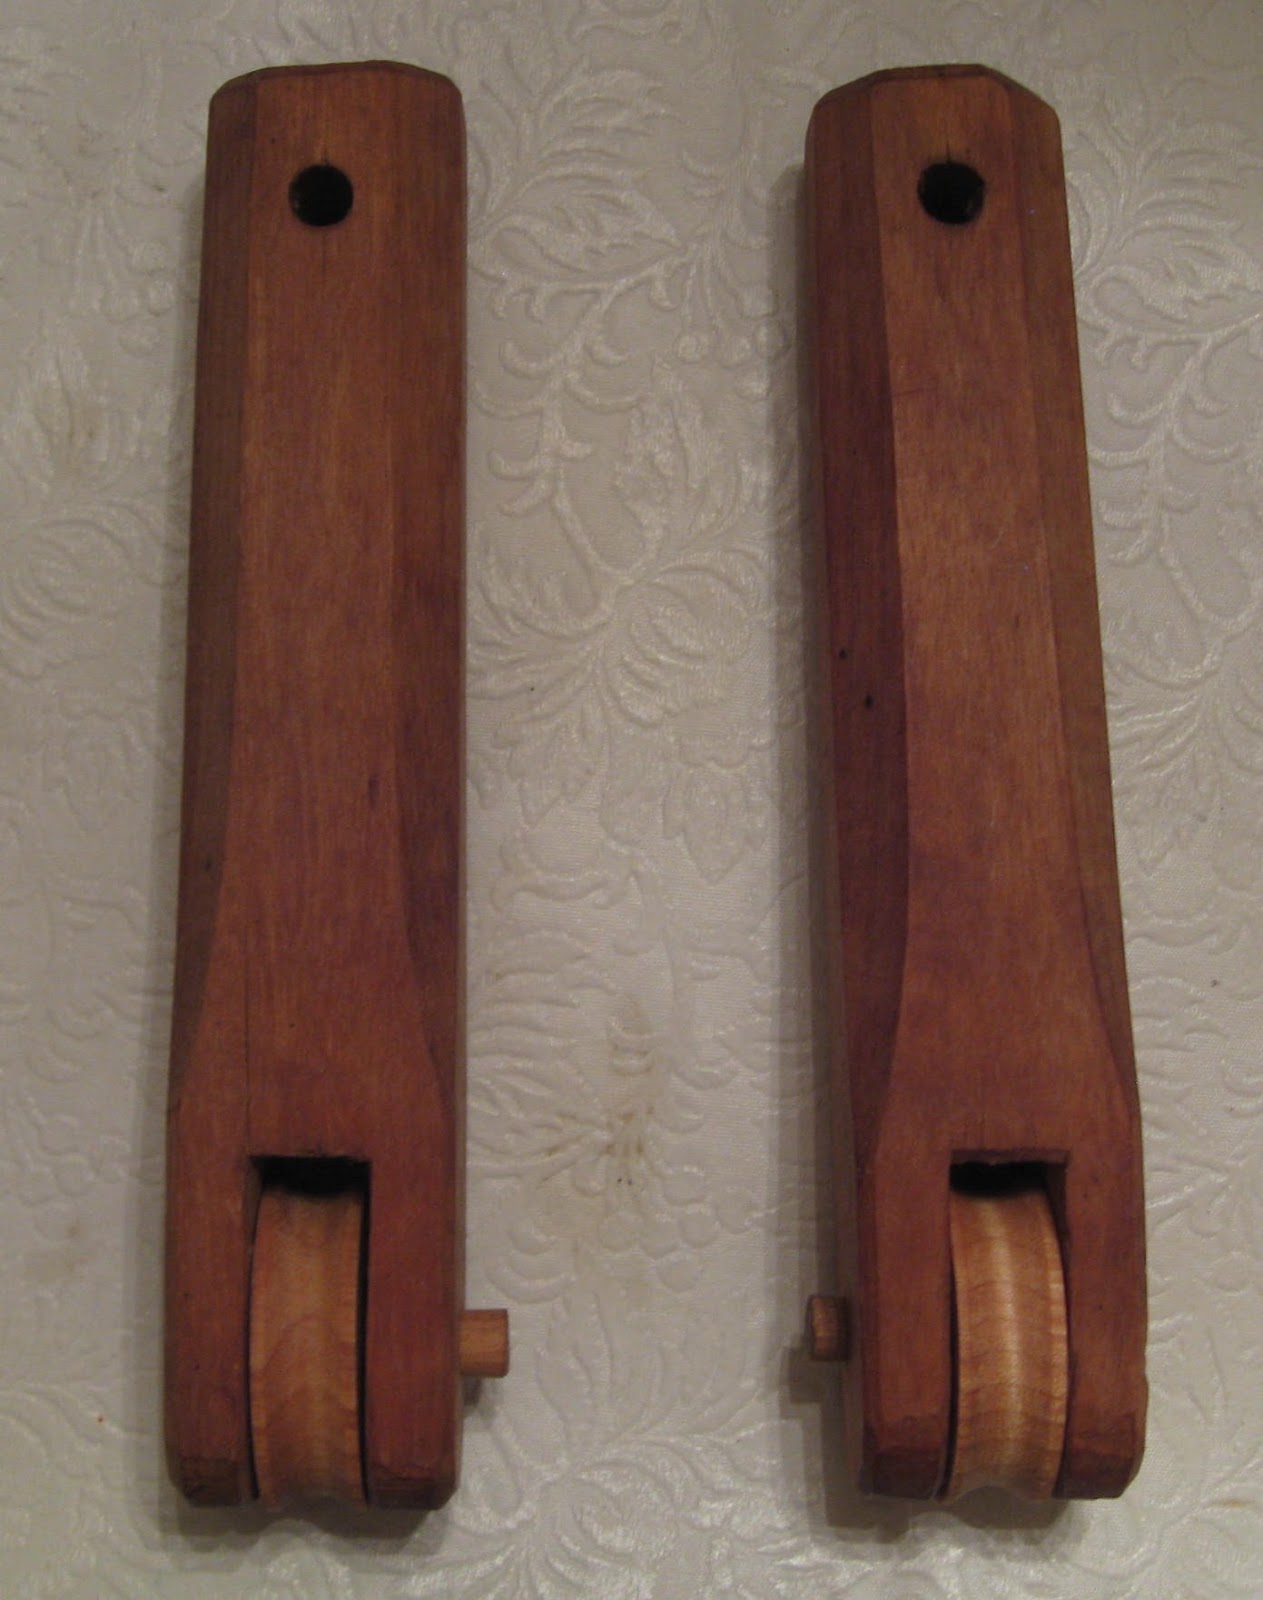
Back in June when we retrieved the loom out of the attic of the OCGH craft house, sadly the harness pulleys were nowhere to be found. When I first posted my blog, Craig Evans of Brookfield NH saw it and offered up some pulleys. He sent me photos of 8 different pairs and ended up sending me 2 pairs to check out with the loom. Here are the ones that looked the best with the loom. They are 7.75" tall and made of yellow birch.
You'll notice in the photo that one is missing the wheel. We have a wonderful thing in our house called "Wifely Sanctioned Shop Time". Since for some reason most weavers' husbands are woodworkers, I'm sure many of you can appreciate this. "Honey, can you go down to your Happy Place and make me one of these?" It's a win-win situation.
The pulleys with new wheels and one new pin
It turns out (no pun intended) that the hole in the one original wheel was a little uneven, so Dan ended up turning two wheels, but was able to reuse the one original pin. The new wheels are also yellow birch.
I still needed to return the second set, and since we were
going to be camping up in NH only about 1/2 hour from Brookfield, I set
a date with Craig to visit his house, which is really more like a
museum for antique textile tool fanatics. Craig showed us all his cool textile stuff and lent us some treadles to use as a template.
I had originally met Craig at a Great Wheel Spinning Bee we held at the Westford Museum. (There will be another in Feb 2013!) He's a genuine appreciator of old textile tools and is a great resource for researchers. Thanks so much, Craig, for your help with this project!
BTW, Craig is planning to have a sale of many of the items from his collection on 14, 15 and 16 September, so if you're interested, feel free to be in touch with him. castor74@roadrunner.com
As promised, a discussion of the heddles. This YouTube video shows what they look like. Once I looked closely, they weren't at all what I had expected. I've heard the term "knit the heddles", but they don't really look "knit". I haven't been able to reverse engineer them, and I haven't been able to connect directly with anyone who knows how to make them.
My friend Diane Howes sent
me a couple pages from Luther Hooper's "Hand-Loom Weaving". (Thanks, Diane!) It was
first published in 1910, so the lingo is kind of out-of-date, but I get
the general idea. However, that's not to say that I'm ready to sit down
and make some. The figure in the book shows a tatting shuttle, and the
directions describe what we would consider "knotting," not "knitting."
(But it's not like nålbinding, for those who might be familiar with this type of not-knotted, one-needle knitting.) So what's next? Maybe I really do just need to sit down and try to do it. Wish me luck!
Here's what the harnesses looked like when I first took them off the loom. The heddles were still on the harnesses, but they were in poor condition. A slight tug would break them.
Here's a closeup of the heddles, although they are hard to see since the twist of the linen makes them coil. Under tension on the loom, they open up to about 10" measured on the outside edges.
This shows the ends of the heddles, where they are tied onto the harnesses.
This is a photo of the harness pieces themselves after removing the heddles and washing them. The score marks every 1 1/2" are used to ensure that the correct number of ends per inch (epi) is attained in the warp. As you weavers know, the correct epi is also dictated by the reed, but when the heddles are knit continuously, they can't be stretched out or compressed together, so they also have to be at the correct sett. I imagine this means that a weaver would need multiple sets of heddles in order to weave goods at different setts.
Coming up is the story about the pulleys and our visit with Craig Evans.
Dan and my dad and I went over Monday evening to work on a couple parts of the loom. First order of business was the warp beam. The horizontal frame pieces on the top and bottom of the back were both exactly the same width as the warp beam, 47 3/8". Obviously then the warp beam would not rotate. So we got permission from the Powers-That-Be to make some irreversible modifications. We took the beam off and Dan used a small back saw to take off about 1/4" on each end of the beam.
Trimming the warp beam tenon
Cleaning up the tenon
The other issue was that the tenon that the brake and handle slide onto was not quite long enough. This would put some stress on the handle when winding the warp, risking the tenon breaking off at the end. Since there was extra bulk there, Dan cut off about 1/4" of the shaft, making the tenon a little longer. He used a chisel to clean it up.
The newly lengthened tenon sticking out of the brake
Once back on the loom, the beam turned freely. The handle mortice is
still deeper than the tenon, but it should be stronger than it was.
(left to right) Warp beam, space to move, vertical frame post, brake, handle
In case anyone is interested, the OCGH is having an open house this coming Sunday, 13 July, 2-4. Dan and I will be there for most of the afternoon. If anyone wants to come tour the house and take a look at the loom, we'd love to show you!
Next up will be a discussion about the string heddles. I still haven't figured out how to reproduce them. We're also working with someone to acquire some pulleys for the harnesses.
Sunday afternoon, Dan and I went to the Garrison House for a little loom assem-bl-y. (Pronounced like Norm says it!) The wood looks very pretty all cleaned up. We had a few glitches along the way, but were able to correct them as we went (like getting it together and then realizing that the back beam was still on the floor behind us - doh!) We took lots of measurements so Dan could work on a few replacement parts: 3 wedges, a pin for the brake, treadles, and some wooden screws.
There are several reeds of varying dents. I'll talk about those on another day. There's also 2 sides (the left and right) of a large warping board. We couldn't find the top and bottom, but those should be easy to replicate once we've got the loom taken care of.
The biggest problem we ran across is the fact that the warp beam is the same length as the structural beams across the bottom and top of the back of the loom. Of course, that means that the beam rubs on the uprights and doesn't move. This makes me wonder if the loom was actually ever used. There are no definitive signs of wear from threads or cloth.
The warp beam is too long and rubs on the uprights.
It's a tight fit!
Me contemplating the options
After looking at the geometry and taking some measurements, it looks like unless we want to leave the frame slightly separated (which would affect the strength and stability of the loom), we are going to have to shave down the end of the beam near the brake. We haven't done it yet, so if anyone has any other suggestion, please let us know.
Cloth beam brake mechanism
These are the only metal pieces on the loom. Dan had to reattach the "saw blade" ratchet to the end of the beam. Oh, I think the roller in the brake pulley is also metal.
The old string heddles
Another thing that's going to take some research and time is making new heddles. The ones that were on it are probably linen. They are all connected, made out of a single piece of thread. Does anyone know of any existing directions on how to make these? I have access to the T-shaped pieces of a heddle and harness maker (Figure 40 of Marion Channing's "The Textile Tools of Colonial Homes".) I do have the four wooden heddle sticks for the tops and bottoms of the harnesses.
Saturday, June 9, 2012
The Beginning
The Old Chelmsford Garrison House in Chelmsford, MA, USA has had an old loom up in the attic of one of the buildings for years. I have often talked about moving it down to an accessible part of the property and setting up for use. Today, I finally started. It's a cantilevered 2-harness counterbalance barn frame loom. Most of the parts are there. It's missing the harness pulleys and some (wooden) screws and the treadles. Fortunately, my husband, Dan, is very talented in the woodshop, and he'll be able to replace most of the missing parts. The pulleys will be the trickiest part.
Today, with the help of our teenage kids, Andre and Baylee, we disassembled the loom and took it out to the grass, washed it down with a solution of Murphy's Oil Soap, let it dry, then brought it into the shed of Garrison House, where it is to be assembled.
Baylee taking the beater out of the attic
One of the sides of the loom. The bottom is on the left.
The second bucket of cleaning solution
.
Washing in progress
Andre carrying the warp beam to the Garrison House.
The process took about 2 hours for 4 people.
The next step is reassembly and some minor repairs and replacements. Making new heddles is going to be a big task, but that's for another day as well.